ARDUINO TUTORIAL #5
INTRODUCTION
In microcontroller programming, especially with Arduino, understanding the binary number system is essential. Binary is the fundamental language of computers and microcontrollers, where all information is represented using only two states: 0 and 1.
Why Learn Binary?
- Understand how microcontrollers process information.
- Work with registers and flags.
- Optimize memory usage and processing speed.
- Perform bitwise operations.
- Control multiple GPIO pins simultaneously.
1. BASIC BINARY NUMBER SYSTEM
Definition:
The binary number system is a base-2 number system that uses only two digits, 0 and 1, to represent numerical values. Each binary digit is called a "bit" (binary digit).
Basic Binary Number System
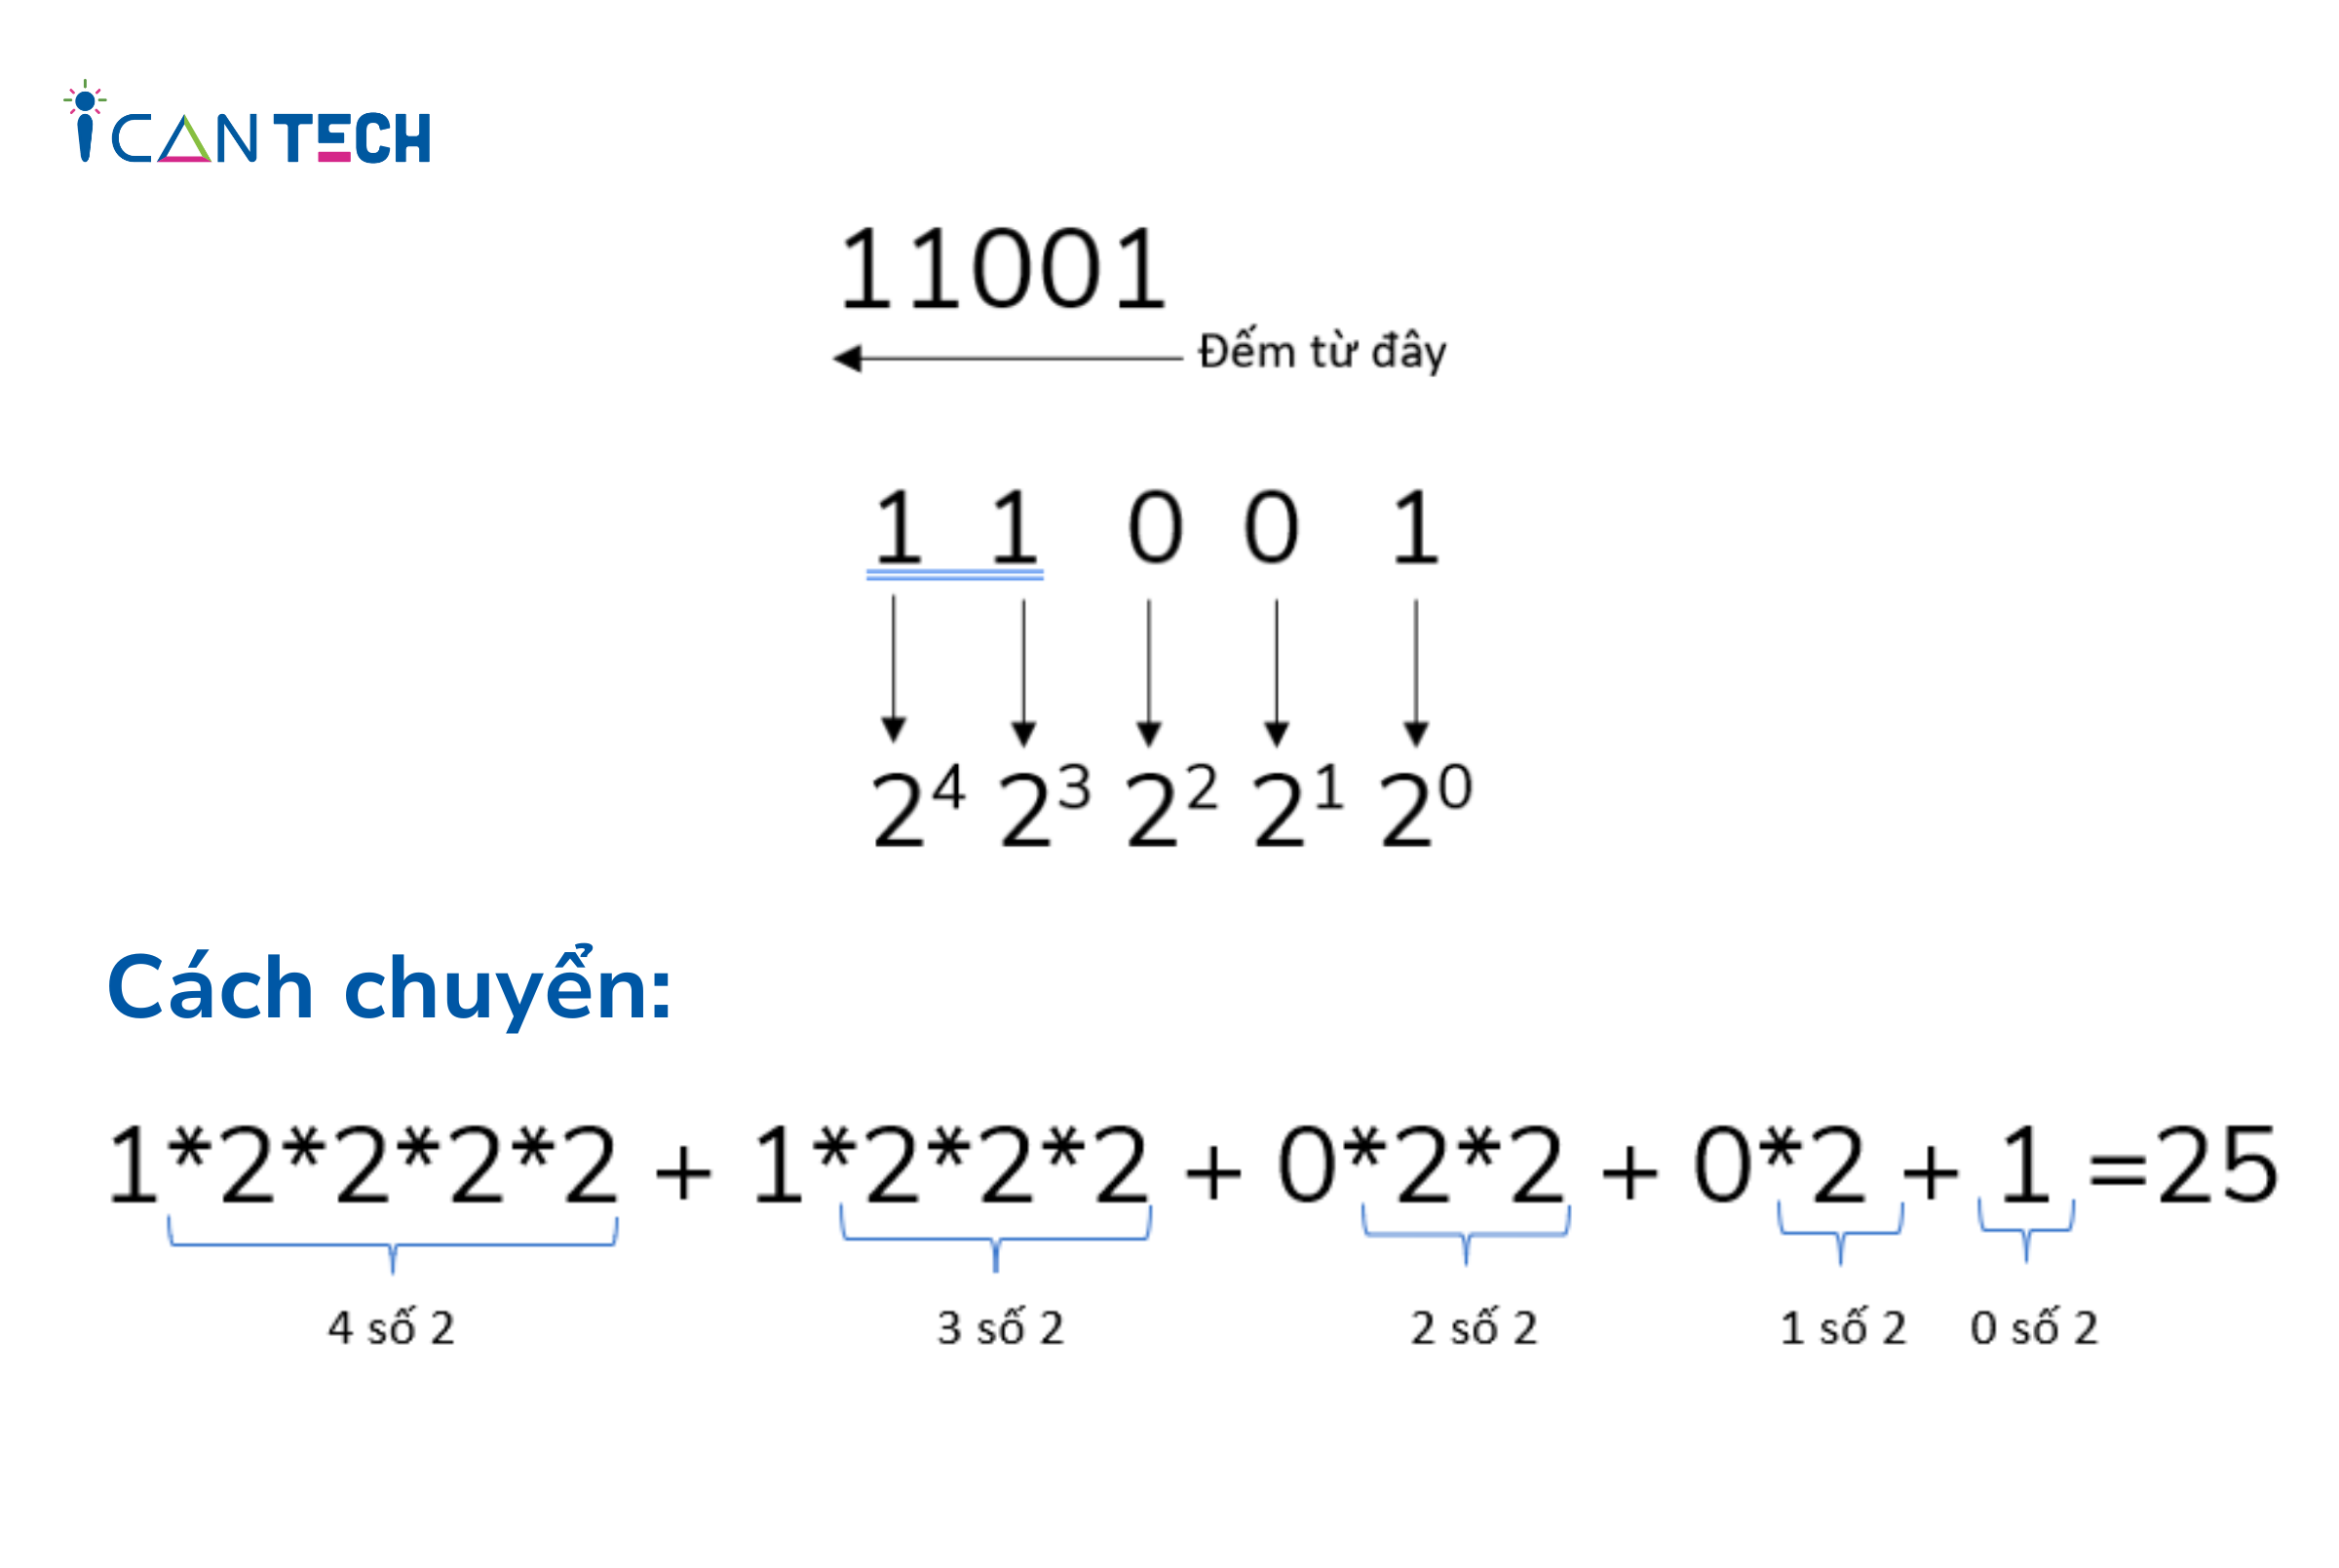
Binary with LEDs
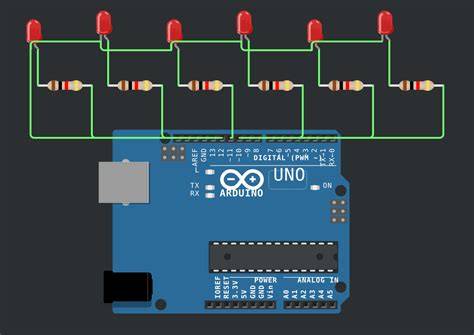
Conversion Between Binary and Decimal
Binary — Decimal — Calculation
0000
0
0×2³ + 0×2² + 0×2¹ + 0×2⁰
0001
1
0×2³ + 0×2² + 0×2¹ + 1×2⁰
0010
2
0×2³ + 0×2² + 1×2¹ + 0×2⁰
0011
3
0×2³ + 0×2² + 1×2¹ + 1×2⁰
0100
4
0×2³ + 1×2² + 0×2¹ + 0×2⁰
0101
5
0×2³ + 1×2² + 0×2¹ + 1×2⁰
0110
6
0×2³ + 1×2² + 1×2¹ + 0×2⁰
0111
7
0×2³ + 1×2² + 1×2¹ + 1×2⁰
1000
8
1×2³ + 0×2² + 0×2¹ + 0×2⁰
Conversion Example:
Binary: 1011 → Decimal: 11
Calculation: 1×2³ + 0×2² + 1×2¹ + 1×2⁰ = 8 + 0 + 2 + 1 = 11
2. BINARY IN ARDUINO
Representing Binary Numbers in Code:
In the Arduino IDE, binary numbers can be represented by adding the prefix0b(orBin traditional Arduino notation) before a sequence of bits.
// Representing binary numbers in Arduino
byte binaryNumber = 0b10101010;
// Binary 10101010 = 170 in decimal
byte anotherBinary = B00001111;
// Binary 00001111 = 15 in decimal
void setup() {
// Initialize serial communication
Serial.begin(9600);
// Print the values to check
Serial.print("Binary 10101010 in decimal: ");
Serial.println(binaryNumber, DEC);
// Prints: 170
Serial.print("Binary 00001111 in decimal: ");
Serial.println(anotherBinary, DEC);
// Prints: 15
}
void loop() {
}
3. CONTROLLING MULTIPLE LEDS WITH BINARY
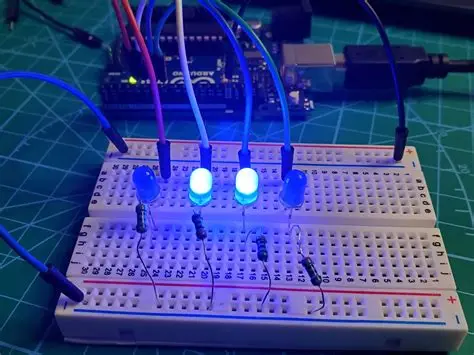
One practical application of binary in Arduino is controlling multiple LEDs simultaneously using a single byte (8 bits). Each bit represents the state of one LED.
// Define the LED pins connected to Arduino
const int ledPins[] = {2, 3, 4, 5, 6, 7, 8, 9};
const int numLeds = 8;
// Initial setup function
void setup() {
// Set all LED pins as OUTPUT
for (int i = 0; i < numLeds; i++) {
pinMode(ledPins[i], OUTPUT);
}
Serial.begin(9600);
}
// Function to control LEDs using a binary number
void setLedsFromBinary(byte pattern) {
// Loop through each bit in the pattern
for (int i = 0; i < numLeds; i++) {
// Check whether bit i is equal to 1
if (pattern & (1 << i)) {
digitalWrite(ledPins[i], HIGH);
// Turn on LED if bit = 1
} else {
digitalWrite(ledPins[i], LOW);
// Turn off LED if bit = 0
}
}
}
// Main loop function
void loop() {
// Turn on LEDs at even bit positions (0, 2, 4, 6)
setLedsFromBinary(0b01010101);
// 85 in decimal
delay(1000);
// Turn on LEDs at odd bit positions (1, 3, 5, 7)
setLedsFromBinary(0b10101010);
// 170 in decimal
delay(1000);
// Turn on all LEDs
setLedsFromBinary(0b11111111);
// 255 in decimal
delay(1000);
// Turn off all LEDs
setLedsFromBinary(0b00000000);
// 0 in decimal
delay(1000);
}
Binary-Controlled LED Circuit
4. BITWISE OPERATIONS IN ARDUINO
Arduino supports bitwise operations that allow direct manipulation of individual bits in binary numbers.
AND (&)
Example: 0b1100 & 0b1010Result: 0b1000
Description: The resulting bit is 1 only if both corresponding bits are 1.
OR (|)
Example: 0b1100 | 0b1010Result: 0b1110
Description: The resulting bit is 1 if at least one corresponding bit is 1.
XOR (^)
Example: 0b1100 ^ 0b1010Result: 0b0110
Description: The resulting bit is 1 if the two corresponding bits are different.
NOT (~)
Example: ~0b1100 (4-bit representation)Result: 0b0011
Description: Inverts all bits (0 becomes 1, and 1 becomes 0).
Note: This example illustrates a 4-bit result. In Arduino C++, the actual result depends on the integer type and its bit width.
LEFT SHIFT (<<)
Example: 0b0001 << 2Result: 0b0100
Description: Shifts all bits to the left by the specified number of positions.
RIGHT SHIFT (>>)
Example: 0b0100 >> 2Result: 0b0001
Description: Shifts all bits to the right by the specified number of positions.
BITWISE OPERATION EXAMPLES
// Examples of bitwise operations
byte a = 0b11001100;
// 204
byte b = 0b10101010;
// 170
// AND operation
byte resultAnd = a & b;
// 0b10001000 = 136
// OR operation
byte resultOr = a | b;
// 0b11101110 = 238
// XOR operation
byte resultXor = a ^ b;
// 0b01100110 = 102
// Left shift operation
byte resultLeftShift = a << 2;
// 0b00110000 = 48 (higher bits are discarded)
// Right shift operation
byte resultRightShift = a >> 2;
// 0b00110011 = 51
PRACTICE EXERCISE
Task:
Using your knowledge of binary numbers and bitwise operations, write an Arduino program that performs the following tasks:
- Connect 4 LEDs to digital pins 5, 6, 7, and 8 of the Arduino.
- Write a function to display numbers from 0 to 15 (0000–1111 in binary) using these 4 LEDs.
- Use bitwise operations to determine the state of each LED.
- Display each number for 1 second before moving to the next number.
Hint:
- Use a
forloop to count from 0 to 15. - For each number
i, use the AND operation with a bitmask to check individual bits. - Example: To check bit 0, use
(i & 0b0001). - To check bit 1, use
(i & 0b0010). - Apply the same method to the remaining bits.